I started my first podcast in 2006 for a friend stationed in Afghanistan. It was a comedy show where we read local news stories and made prank calls.
This first podcast sounded professional out of the gate because we recorded in my dad’s studio. But when I moved out of my parent’s basement, I was forced to buy my own equipment.
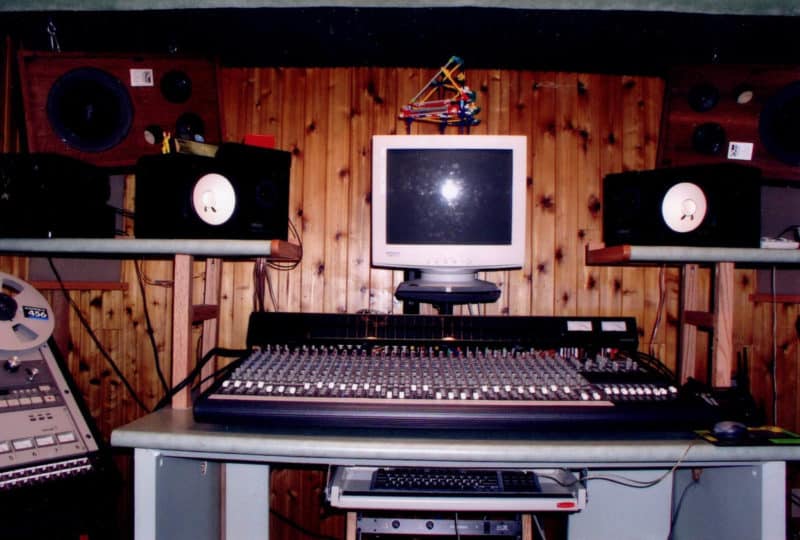
My dad’s recording studio in 1997.
I’ve been leveling up my podcasting gear ever since. But I feel I’ve finally reached the pinnacle of podcast perfection.
My Original Podcast Setup
Originally, when I got serious about podcasting in 2013 with the Listen Money Matters show, this was my podcasting equipment (affiliate links):
- Rode NT1-A Vocal Cardioid Condenser Microphone
- Beyerdynamic DT 770 PRO 80 Ohm Over-Ear Studio Headphones
- And a PreSonus AudioBox USB Audio Interface which allows me to connect the microphone to the computer.
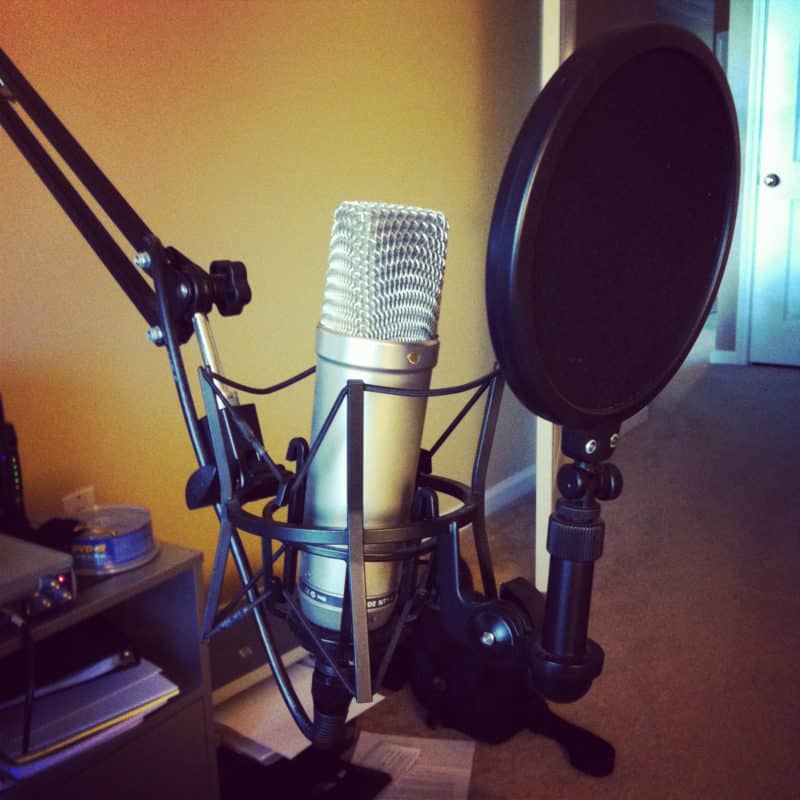
My first podcasting microphone (Rode NT1-A) and in the corner is the PreSonus AudioBox.
I was recording in a small office with carpet, low ceilings, and a big-ass fluffy couch. My room was quiet.
Andrew’s, on the other hand, sounded like he was in a high school gym! So I made him put up foam padding. But it only helped a little.
Andrew’s first podcasting setup with acoustic foam on the walls. Both of us are using the Rode NT1-A Vocal Condenser mics. But as you can see, I have a couch in my small office. That helps reduce room noise.
The real problem was the condenser microphones we were using.
Condenser mics have a natural sound but pick up a wider frequency response. In other words, if you have a big empty room, you’re gonna sound like you’re in a big empty room.
Dynamic microphones are more common for broadcast radio, and therefore, podcasting. They reject more room noise which is great for big empty rooms. You might still pick up some room noise, but not nearly as much as a condenser mic would.
So the was the first upgrade was the microphone.
More Podcast Equipment Upgrades
I wanted my voice to sound like a real radio show. So I had to invest in a broadcast-level microphone. I chose the Shure SM7B because it’s the industry standard.
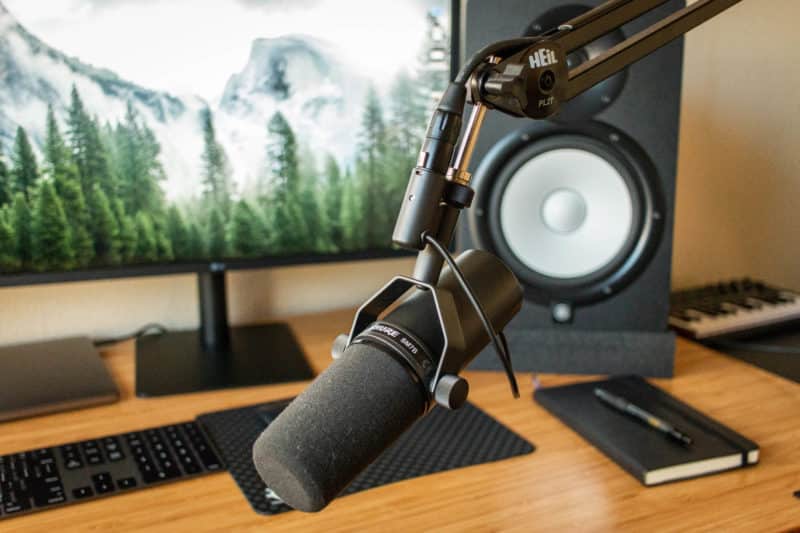
The Shure SM7B on a Heil PL2T Boom Arm.
As for my old PreSonus AudioBox USB Audio Interface to connect the mic to the computer, I upgraded to a Mackie ProFX8 mixing board.
But because this mic requires a lot of gain to get good audio from it, I had it cranked up to the max.
Not the best solution.
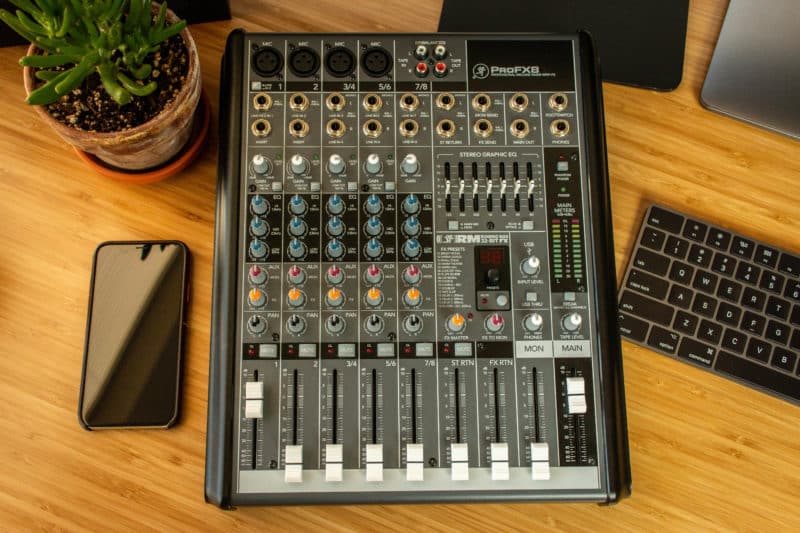
The Mackie ProFX8 Mixing Board
So I bought a CloudLifter which allowed me to use phantom power to increase the volume of the mic. This worked fine, but it was a temporary solution.
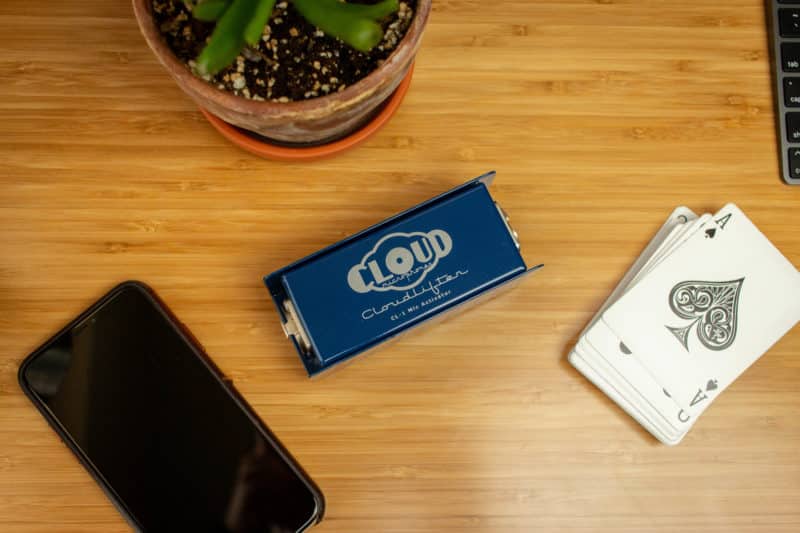
Cloud Microphones CL-1 Cloudlifter 1-channel Mic Activator
I knew the most important piece was a preamp. So I decided to upgrade the whole setup.
My Professional AF Podcast Setup
I wanted to build a podcasting studio in my bedroom office where I could invite people over and do a round table radio show. The equipment needs to be consistent (and scalable), while the room needed to be acoustically treated.
I like the Shure SM7B microphone and my original beyerdynamic DT 770 PRO headphones. So I purchased another set.
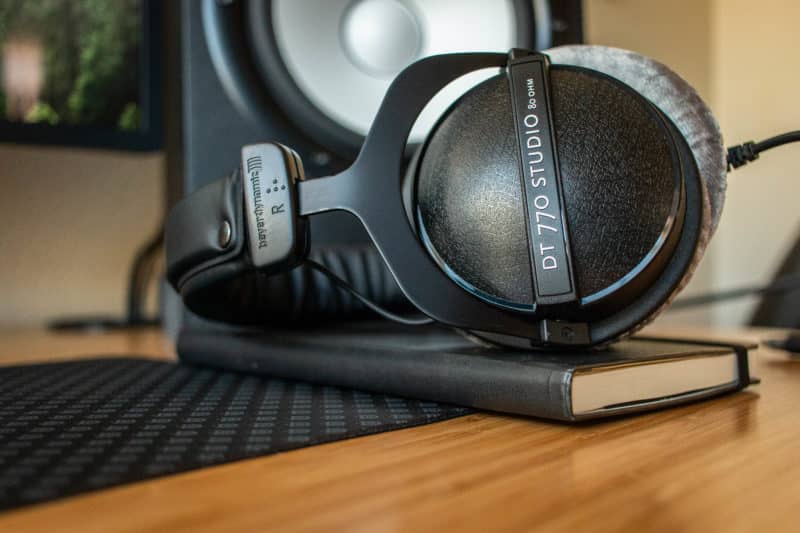
Beyerdynamic DT 770 PRO 80 Ohm Over-Ear Studio Headphones. The speaker in the background is a Yamaha HS8 Powered Studio Monitor, in case you were curious.
I wanted a good set of preamps that would power the SM7B microphones. I stumbled on a video from Sean McCabe on Twitter where he was talking into the same mic.
His voice sounded really good and clean. I could tell he was using a preamp.
https://twitter.com/seanwes/status/1110981838200365062?s=20
I asked what preamp he used and he recommended the DBX 286s.
So I bought one to test out.
This preamp changed EVERYTHING.
After setting it up, I realized the built-in compression and noise gate removed most of my room noise. However, I still might buy some for recording music, and I’ll be investing in these (I’m a Marcus Lemonis fanboy): https://overtoneacoustics.com/
Also, here’s the kick-ass video I followed from Caleb Wojcik on how to set up the dbx 286s preamp:
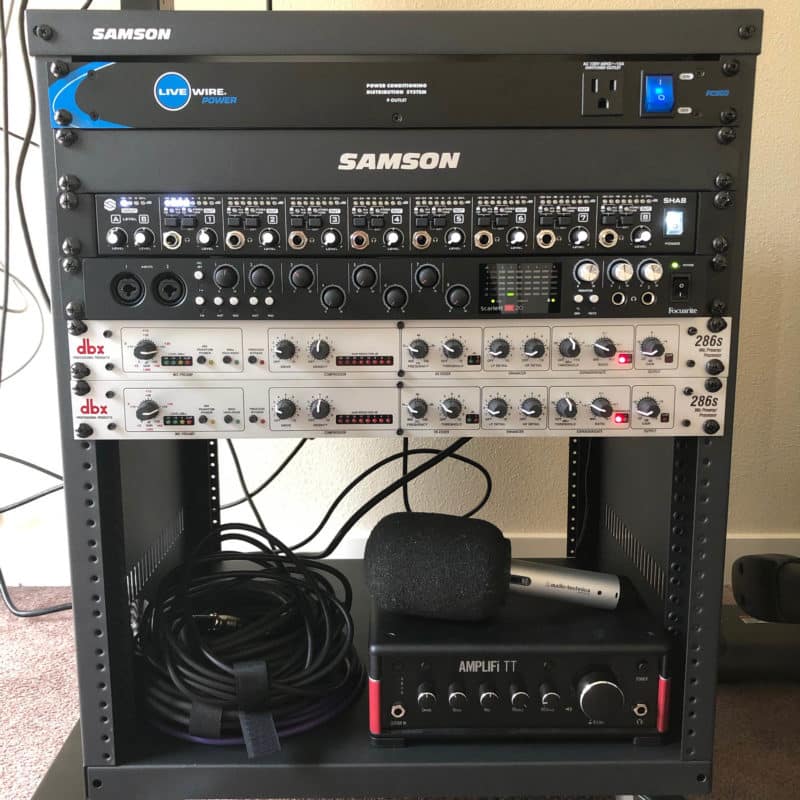
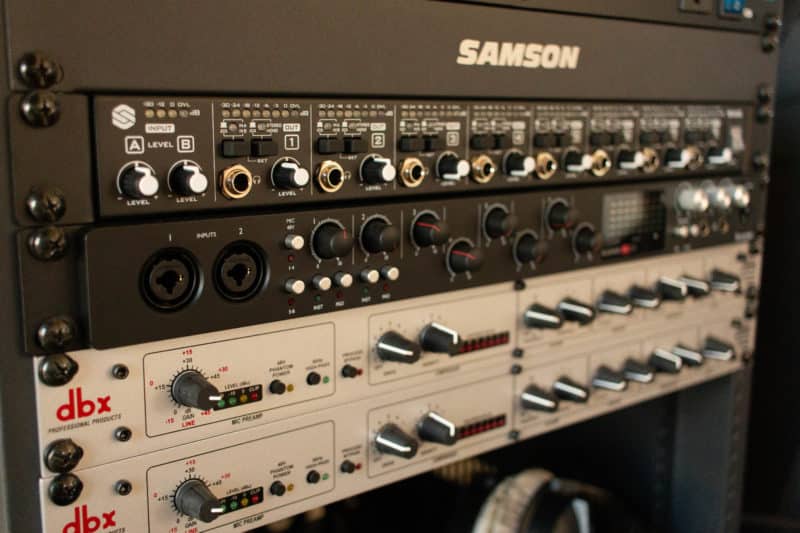
The Final Podcast Rack Setup
Technically this is a good setup. But the dbx 286 is a rack-mount device, so it looked FUGLY just sitting on my desk. And because it only works for one microphone, I would need two to power both mics. Two would have looked real bad.
So I bought a rack stand.
And then a power conditioner. And a headphone amp. And a new audio interface to completely replace my non-rack-mounted mixing board.

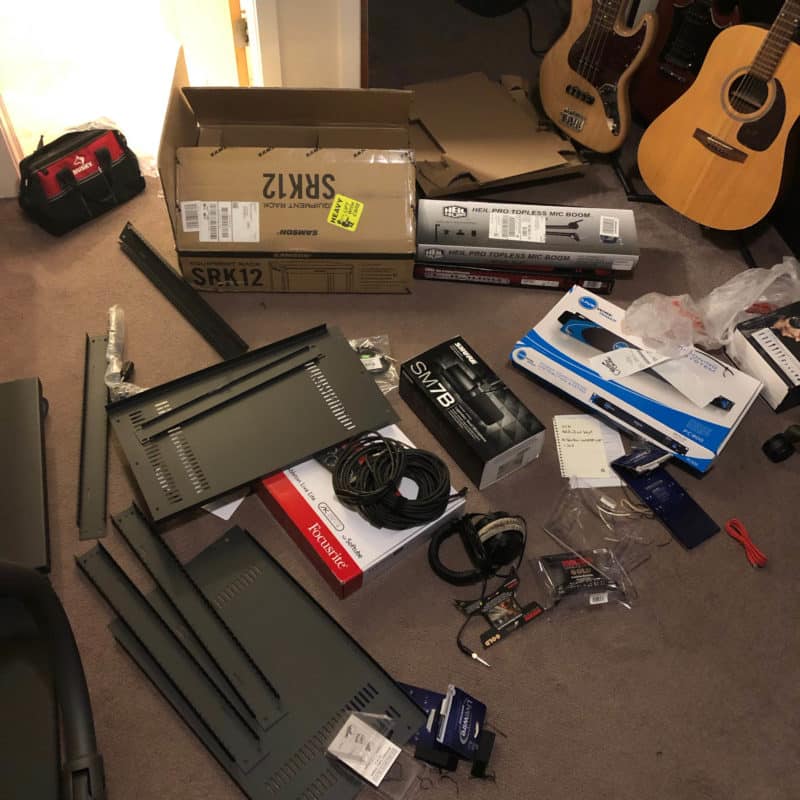
Here’s the list of all the equipment (these are affiliate links):
- Samson SRK-12 Universal Equipment Rack Stand
- Livewire 9-Outlet Power Conditioner and Distribution System
- Sterling SHA8 8-Channel Rackmount Professional Headphone Amplifier
- Focusrite Scarlett 18i20 (2nd Gen) USB Audio Interface
- 2 dbx 286s Microphone Preamp & Channel Strip Processors
- 2 Shure SM7B Cardioid Dynamic Microphones
- 2 beyerdynamic DT 770 PRO 80 Ohm Over-Ear Studio Headphones
- 2 Brainwavz Hengja Headphone Desk Hangers
- 2 Heil Sound PL-2T Overhead Broadcast Boom
How much did I spend on all this? $2,497.85 (not including tax).
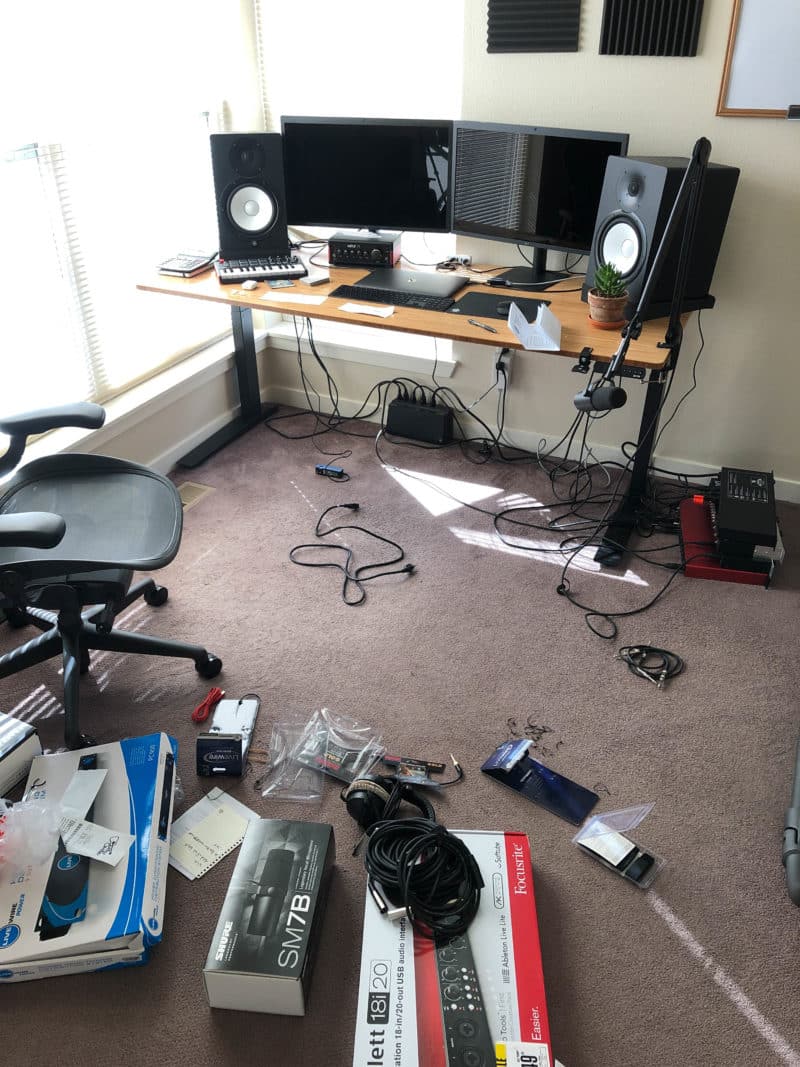
On top of building this, I decided it was time to finally hide all my loose wires and invest in some cable management.
Boom!
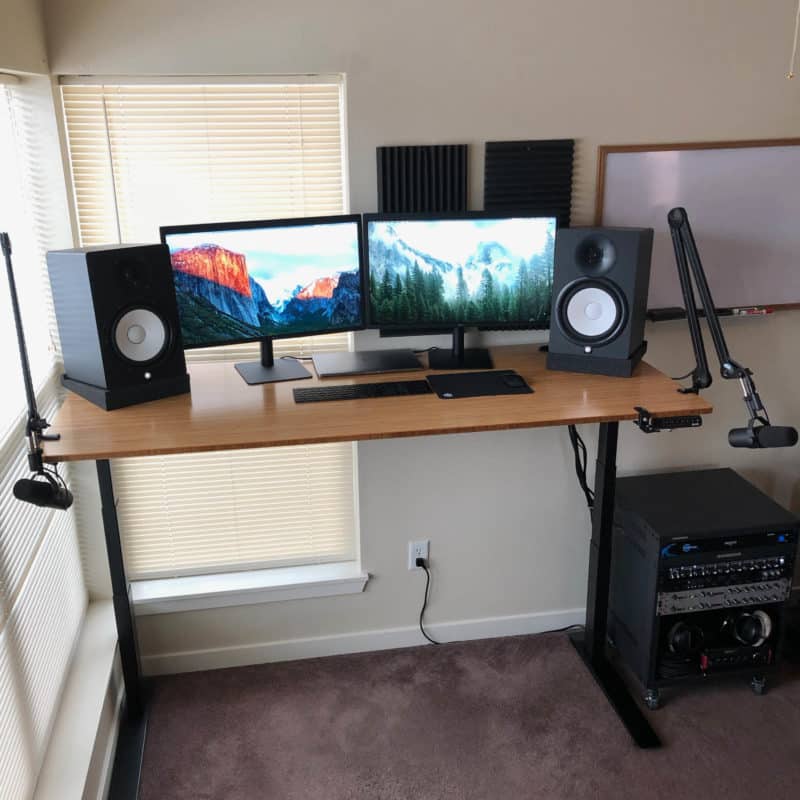
The New Podcasting Studio Setup. Look Ma, no wires! Except for the power cable. Give me a fucking break, Ma!
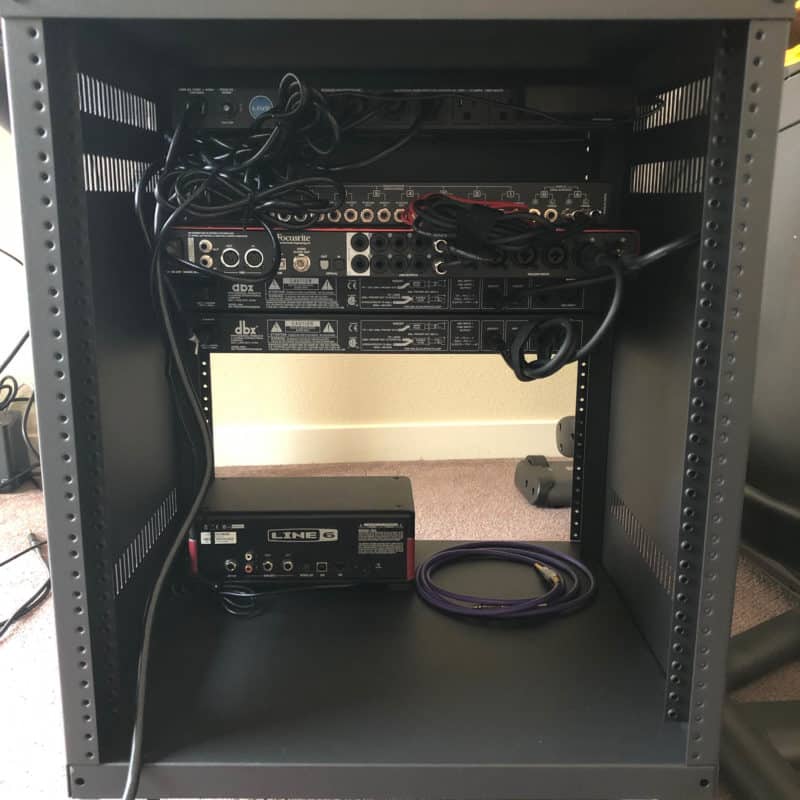
The Podcasting Rack (in Order and Why)
The first slot contains the Livewire 9-Outlet Power Conditioner. This is just a fancy name for a power strip. It allows me to power all the devices below it.
Then, I added the Samson spacer that came with the rack stand. This adds space between the power conditioner and the rest of the audio equipment to reduce possible interference.
Below that is the Sterling SHA8 8-Channel Rackmount Professional Headphone Amplifier which allows me and my guest to control separate headphone volumes. I can plug eight pairs of headphones into this bad boy!
Under that is the Focusrite Scarlett 18i20 (2nd Gen) USB Audio Interface. This replaced my Mackie ProFX8 mixing board. And this allows me to plug in eight different microphones/instruments and record them on separate tracks in the computer.
NOTE: The Mackie had eight inputs too, but I could only record them into on track in the computer. Not very flexible.
Below the Focusrite are the two dbx 286s preamps with room to add more when I invest in more microphones.
How These Upgrades Made a Huge Difference in Podcast Sound Quality
It’s hard to write about sound quality improvement. To be fair, my original sound quality has always been above average. But this setup has pushed me into a new level of professionalism.
Just listen to the first episode of the Money Lab podcast I recorded in my office with Thomas Frank. I was on my Shure SM7B Mic with a CloudLifter and he was using an Audio Technica ATR 2100.
While the overall quality is good, see if you notice the room noise. You’ll need a good pair of headphones to detect it.
Now listen to a more recent episode of Money Lab I recorded with Jason Moore and my new setup. See if you notice a tighter sound from our voices with a more broadcast-level quality.
With a good pair of headphones, you’ll still notice a slight room sound. That’s because my office has vaulted ceilings and nothing to absorb audio.
While the preamps really helped, I still want to treat my office with acoustic panels.
Why I Upgraded My Podcasting Gear
I’ve been podcasting for over 10 years. It’s now a huge part of my life and business. I’ve written several articles about it here, here, and here.
And I always loved the art of broadcasting too. I took radio broadcasting classes in high school and was part of the PA club. Yes, nerd-alert me all the fuck you want!
But this is more than just a podcasting setup. It’s for recording music and radio ads.
One of the biggest factors for leveling up the audio gear was our plan for producing high-quality podcast ads. We wanted to create traditionally scripted radio-style ads for our products to promote on the Money Lab podcast.
![Monetizing For Bloggers: Make Serious Money With Your Site [COURSE]](https://www.moneylab.co/wp-content/uploads/Monetizing-For-Bloggers-Podia.webp)
Learn the best way to monetize your niche/authority websites for fast revenue growth and sustainability.
We wrote the script. Then, I blew out my vocal cords out recording the voiceovers and overdubs. Yes, I pitched my vocals down a few steps. My voice is not that deep.
Everything was recorded and mixed in Logic Pro X, which we also use to edit and mix our podcast episodes.
And when I use the words “we” and “our,” I don’t mean it in the royal sense.
Hiring a Creative Podcast Producer
The last piece to recording a podcast that sounds insanely professional is the actual content. And the Money Lab podcast is produced by Steph Halligan. I’m just the talent.
Steph is in charge of the content and quality of every episode of Money Lab. She…
- Comes up with the episode topics.
- Schedules the episode recordings and guests (if needed).
- Writes the show outline in Google Docs. Including collecting my new middle name suggestions at the beginning of each show.
- Edits and mixes the recorded episode.
- Schedules the episodes to be published via Transistor.
The most important part of the job is coming up with episode topics. She developed a set of “Roadrunner Rules” that determines if an episode idea actually becomes an episode.
The rules include:
- Question everything
- Find a better way
- Open it up for discussion
The best part about working with someone who is creative and can do it all is I just show up and hit record. That’s it.
It allows me to focus on being entertaining, audio quality, and actually recording a better show.
BONUS: My Travel Podcasting Setup
I don’t travel much. But when I do, I like to travel with podcasting gear. You never know if you need to record a show or guest on someone else’s.
I bought an ATR2100 Audio-Technica USB Microphone. This is hands down the best fucking beginner and travel podcast microphone on the planet.
If you disagree, then you’re wrong.
It’s foolproof. You plug it in and hit record. Impossible to screw up. I recommend this microphone to everyone who wants a simple setup. I just make sure I either record outside or in a room with lots of padding.
A podcasting course from Pete McPherson of DoYouEvenBlog.com.